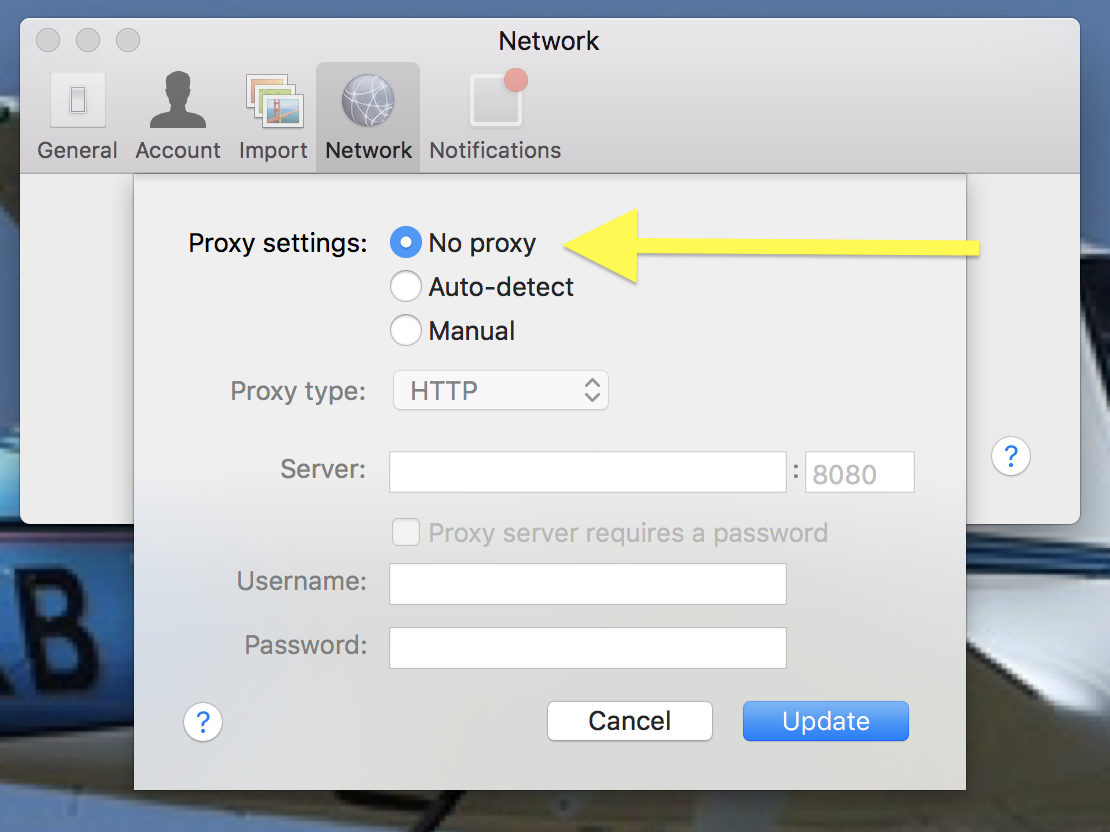
Method 1: Proxy setting in Dropbox Preferences is set to No Proxy
Method 2: Make Sure the Date and Time of Your Computer Are Set Correctly
Your PC will make a comparison between the system date and the expiration date of the SSL certificate, therefore, it is pretty important to make these two settings match.
So if the two dates don’t match, then the can’t establish secure connection Dropbox error will occur. And for the sake of fixing Dropbox cannot establish a secure connection error, you are supposed to do the following things.
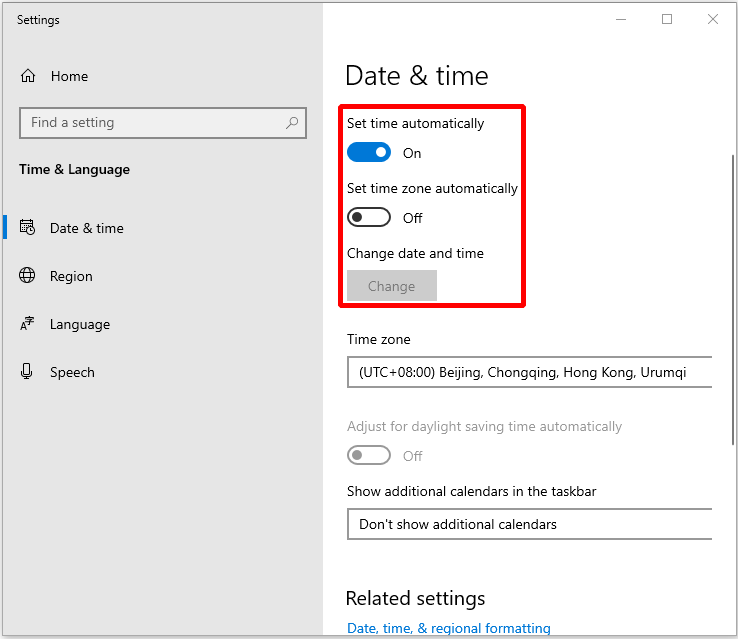
Step 1: Open Settings and click Time & Language in the Windows Settings window.
Step 2: Select Date & time from the left side menu.
Step 3: Make sure that both Set time automatically and Set time zone automatically options are turned on.
Step 4: If both of the two options are turned on while your system can’t access the internet, then you need to turn off the two options and click the Change button to set the time manually.
Method 3: Confirm Firewall and Antivirus Software Are Not Stopping the Dropbox Service
As we all know, antivirus software such as Windows Defender firewall will block any unauthorized internet services, so the possibility of Dropbox service being blocked is very high. Thus, you need to add Dropbox to the whitelist of your antivirus software.
Now let us take Windows Defender firewall as an example, you need to do the following steps to whitelist Dropbox.
Step 1: Enter Windows Defender in the search box next to Cortana and choose the best matched one to continue.
Step 2: Click Firewall & network protection to open a new window.
Step 3: Click Allow an app through firewall to open a new window.

Step 4: Click Change settings and find the Dropbox from the list.
Step 5: Check Private and Public for this app and then click OK to save and apply the changes.
Method 4: Exclude files or folders from Antivirus scanning
e.g. ESET Antivirus
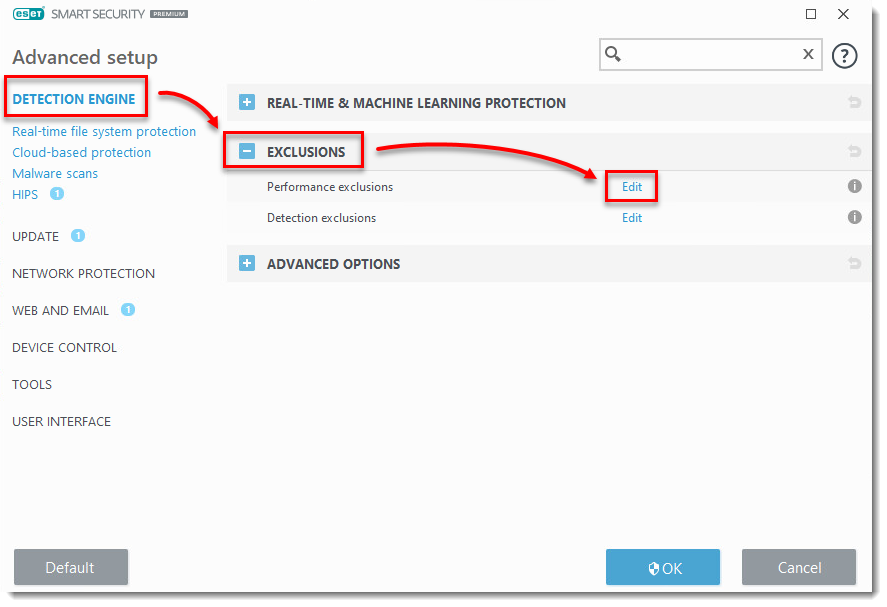
- Open the main program window of your ESET Windows product.
- Press the F5 key to access Advanced setup.
- Click Detection Engine, expand Exclusions and click Edit next to Performance Exclusions.
Version 13.0.x users: Click Detection Engine, expand Basic and click Edit next to Performance Exclusions.
Version 12 and earlier users: Click Detection Engine and click Edit next to Files and folders to be excluded from scanning.
- Click Add → Browse (…).
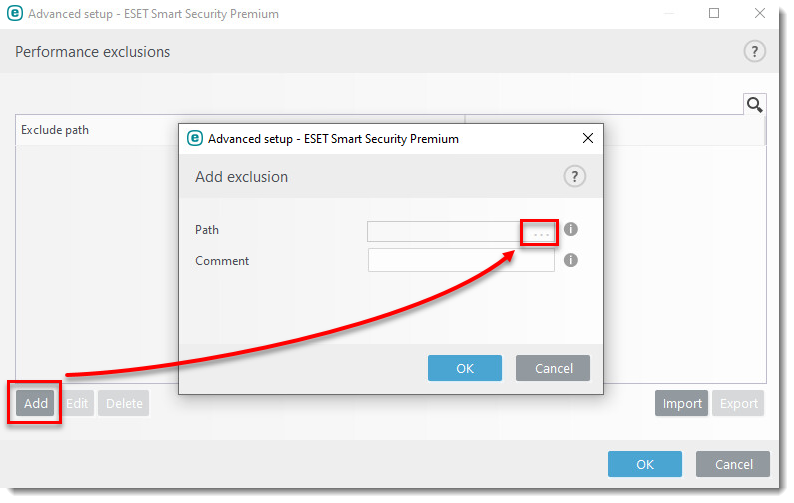
- Use the directory tree to browse for the file or folder you want to exclude, select it, and then click OK.
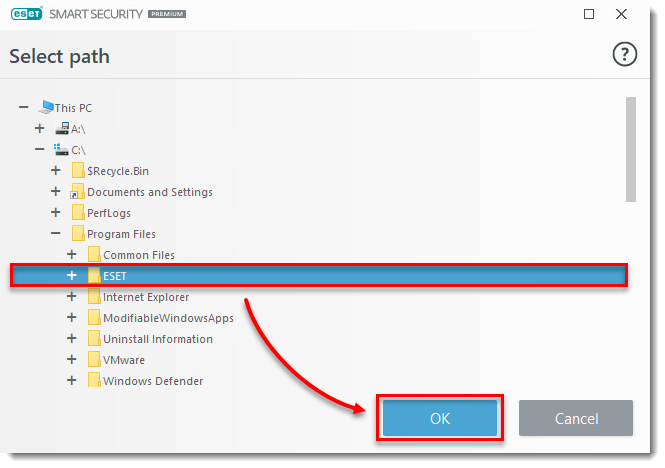
- Click OK → OK to save the exclusion.